America's Beef Jerky Outlet, Sterling Heights, MI 48310
Jerky has become increasingly popular in recent years, and for good reason. Its delicious taste, long shelf life, and high protein content make it a favorite snack among many people. But why is jerky so popular?
One reason is its versatility. Jerky can be made from various meats, but the most common choices are venison and beef. Both meats have their own unique flavors that complement the jerky-making process. Venison, being lean and gamey, adds a rich and distinct taste to the jerky. On the other hand, beef is more widely available and has a milder flavor that pairs well with different marinades and seasonings.
Another factor that contributes to the popularity of jerky is the seasonality of its production. Jerky season typically coincides with hunting seasons, such as elk and white-tail deer. During this time, hunters often find themselves with an abundance of venison or beef that they don’t know what to do with. Making jerky is the perfect solution to use up this meat and enjoy it throughout the year.
While there are countless jerky recipes available, it’s important to remember that personalization is key. The recipe provided is just a starting point, and individuals are encouraged to add their own twists and flavors to make the jerky truly their own. Whether it’s adjusting the spice level, experimenting with different marinades, or even trying out different meat cuts, the possibilities for customizing jerky are endless.
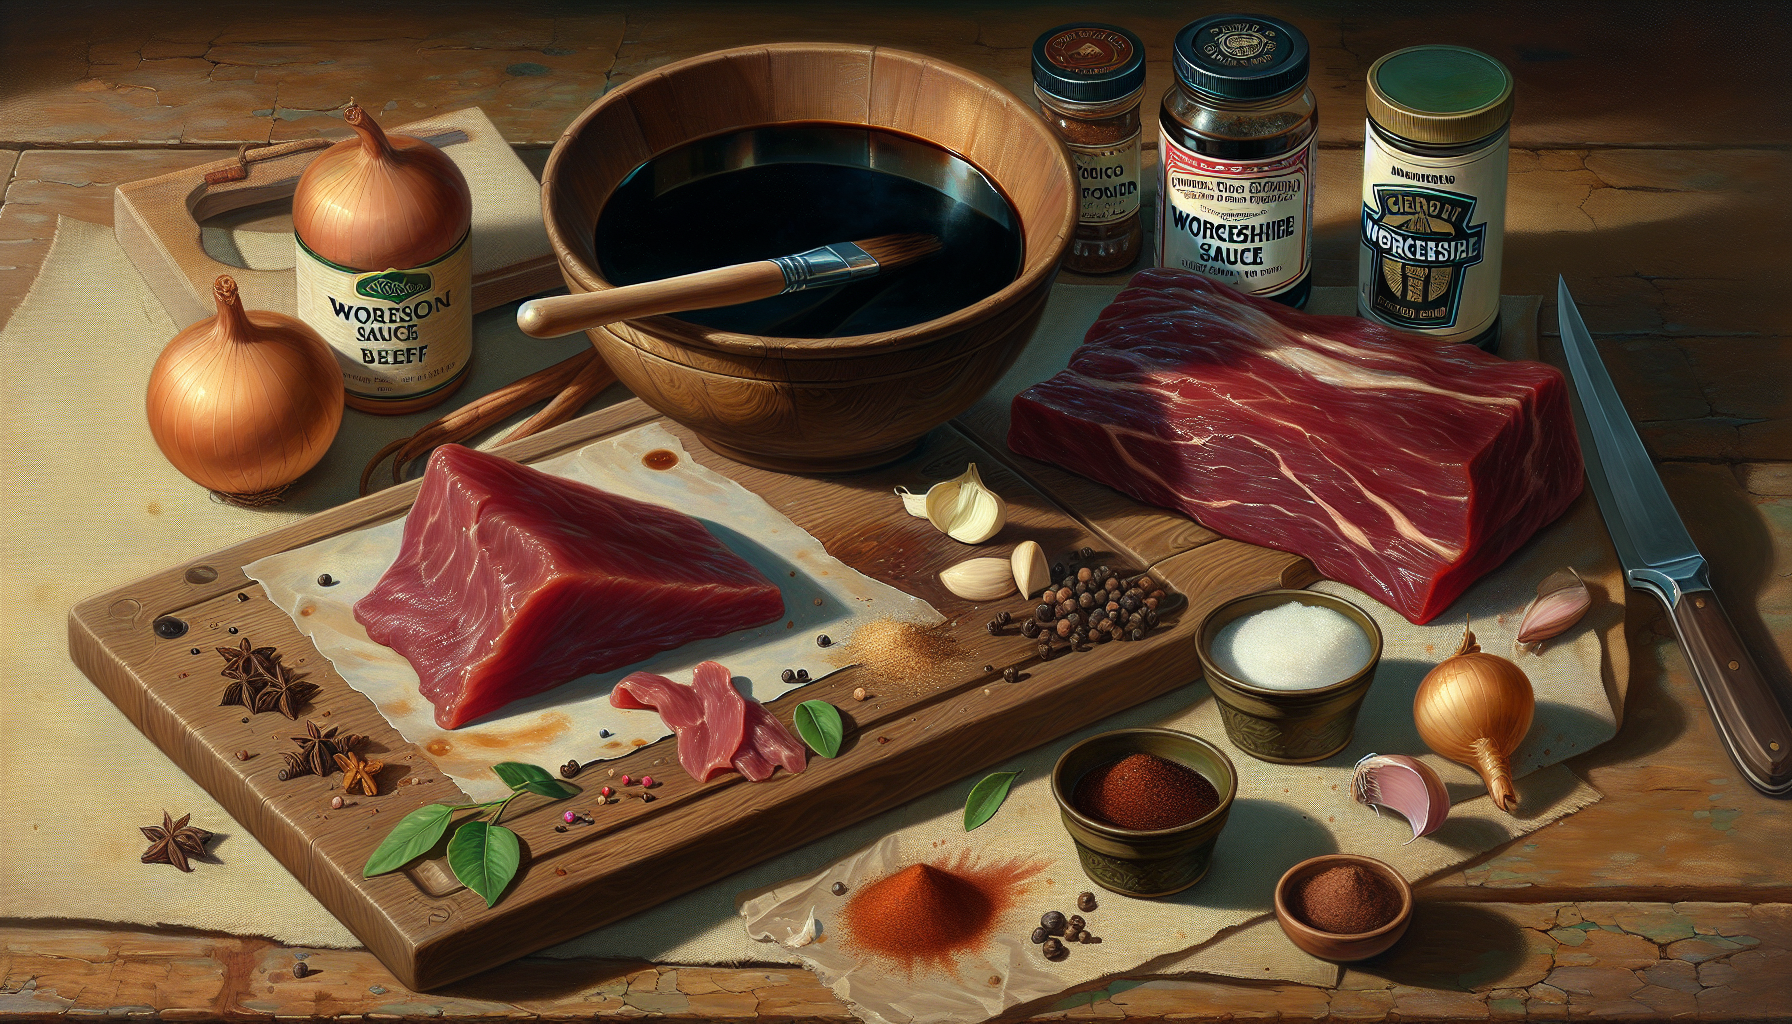
Creating the Marinade
Now that you have chosen your meat for jerky, it’s time to create the marinade. The marinade is crucial for infusing flavor into the meat and enhancing its taste. Here are the key points to consider when creating the marinade:
- Ingredients for the marinade: The basic ingredients for a classic jerky marinade include soy sauce, Worcestershire sauce, cider vinegar, brown sugar, garlic and onion powder, paprika, and your choice of seasoning. Matt recommends using Meat Church Holy Cow seasoning for wild game jerky.
- Recommended substitutes and adjustments: While the provided recipe is a great starting point, don’t be afraid to make it your own. Feel free to experiment with different spices, seasonings, and sauces to create a unique flavor profile. You can also adjust the spice level by adding more cayenne or red chili flakes.
- Importance of tasting the marinade: When you have prepared the marinade, it’s essential to taste it before adding the meat. This allows you to make any necessary adjustments to suit your preferences. Feel free to add more spices or sauces to achieve the desired flavor.
- Marinating tips and recommendations: To ensure maximum flavor absorption, it is recommended to marinate the meat for at least 8-12 hours or overnight. You can use a vacuum-sealed bag to marinate the meat, as it helps to distribute the marinade evenly. It’s also a good idea to periodically flip the meat in the bag to ensure all sides are coated. However, if you prefer a shorter marinating time, you can still achieve great results.
Remember, the marinade plays a crucial role in the overall taste of your jerky. Don’t be afraid to get creative and adjust the flavors to your liking. Enjoy the process of creating your own unique marinade that will make your jerky truly delicious!
Choosing the Right Tools
When it comes to making jerky, using the right tools can make a big difference in the quality and ease of the process. Here are some benefits of using a slicer for thin jerky:
- Consistent thickness: A slicer allows you to achieve a uniform thickness for your jerky slices, which is important for even cooking and drying.
- Efficiency: Slicing jerky with a knife can be time-consuming and challenging, especially if you want it to be thin. A slicer makes the process much quicker and more efficient.
- Easier handling: Thin slices of jerky are easier to handle and chew, making them more enjoyable to eat.
Compared to using a knife, a slicer offers more precision and control, resulting in better quality jerky. It also saves you time and effort, allowing you to make larger batches of jerky more easily.
When it comes to choosing the right meat for jerky, lean cuts are recommended. Lean meats, such as eye of round, top round, or bottom round, work best for jerky because they have less fat that needs to be removed during the drying process. This results in a leaner and healthier jerky.
As for the specific tools, there are several options available for making jerky. A slicer, as mentioned earlier, is a great tool for achieving thin and consistent slices. However, if you don’t have a slicer, you can still make jerky using a sharp knife. Just keep in mind that it may take more time and effort to achieve the desired thickness.
Other tools that can be useful for making jerky include a vacuum-sealed bag for marinating the meat and a dehydrator for drying the jerky. While these tools are not necessary, they can greatly simplify the jerky-making process and ensure optimal results.
In conclusion, choosing the right tools for making jerky can greatly enhance the overall experience and quality of the final product. Whether you opt for a slicer or a knife, the key is to ensure thin and consistent slices of lean meat. So gather your tools and get ready to make some delicious homemade jerky!
Preparing the Meat
Before diving into the process of making jerky, it’s important to properly prepare the meat. Here are some key steps to follow:
- Preferred Thickness: For a satisfying jerky experience, it’s best to slice the meat thin. This not only ensures even cooking and drying but also reduces the chewiness of the final product. Matt recommends slicing the meat to about 1/8 inch thickness.
- Slicing the Meat: To achieve the preferred thickness, it is highly recommended to use a slicer. A slicer allows for more precision and control, resulting in consistent slices. However, if you don’t have a slicer, using a sharp knife can still work, although it may require more effort and time.
- Recommended Cuts of Meat: When it comes to making jerky, lean cuts of meat are the way to go. Matt suggests using cuts such as eye of round, top round, or bottom round. These cuts have less fat, making them ideal for drying.
- Removing Excess Fat: Before marinating the meat, it’s crucial to remove any excess fat. Fat does not dehydrate well and can lead to spoilage. Trim off the visible fat to achieve a leaner and healthier jerky.
By following these steps and ensuring the meat is properly prepared, you’ll be on your way to creating delicious homemade jerky. Remember to slice it thin, use lean cuts, and remove excess fat for the best results. Happy jerky making!
Marinating the Meat
Marinating the meat is a crucial step in making delicious jerky. Here are some key points to consider when marinating:
Using a vacuum sealer for marinating
Using a vacuum sealer is highly recommended for marinating the meat. It helps to distribute the marinade evenly and ensures maximum flavor absorption. A vacuum-sealed bag also keeps the meat and marinade in close contact, resulting in a more flavorful jerky.
Advantages of marinating in a vacuum-sealed bag
Marinating in a vacuum-sealed bag has several advantages. It prevents any air from entering the bag, which helps to preserve the freshness of the meat. The vacuum seal also enhances the marinating process by allowing the marinade to penetrate the meat more effectively. Additionally, it minimizes the mess and allows for easy storage of the marinating meat in the refrigerator.
Demonstration of marinating the meat
To marinate the meat, simply prepare the marinade according to the recipe. Place the meat and the marinade in a vacuum-sealed bag. Seal the bag using a vacuum sealer, ensuring that all the air is removed. Gently massage the bag to distribute the marinade evenly. Allow the meat to marinate in the refrigerator for at least 8-12 hours or overnight.
Recommended marinating time
For optimal flavor, it is recommended to marinate the meat for at least 8-12 hours or overnight. This allows the flavors to fully develop and infuse into the meat. However, if you prefer a shorter marinating time, you can still achieve great results. Just keep in mind that the longer the marinating time, the more flavorful the jerky will be.
Marinating the meat is a crucial step in creating delicious homemade jerky. By using a vacuum sealer and following the recommended marinating time, you can ensure that the meat is infused with maximum flavor. So don’t skip the marinating process and enjoy the mouthwatering taste of your homemade jerky!
Dehydrating the Meat
Now that the meat has been marinated, it’s time to dehydrate it and transform it into delicious jerky. There are different methods you can use to dehydrate your jerky, but one popular and convenient option is using a dehydrator. Here are some benefits of using a dehydrator:
- Consistency: A dehydrator allows you to achieve consistent results every time. It ensures that the jerky is evenly dried and prevents any undercooked or overcooked pieces.
- Efficiency: Dehydrators are designed to efficiently remove moisture from the meat, speeding up the drying process. This means that you can enjoy your homemade jerky in a shorter amount of time compared to other methods.
- Preservation of Nutrients: Dehydrating the meat at a low temperature helps to preserve the natural nutrients and enzymes present in the meat, making it a healthier snack option.
- Control over Temperature and Timing: Most dehydrators allow you to adjust the temperature and time settings, giving you control over the drying process. This allows you to achieve the desired texture and doneness of your jerky.
When using a dehydrator, it’s important to follow the manufacturer’s instructions regarding temperature and timing. However, as a general guideline, it is recommended to dehydrate the jerky at a temperature of 160°F (71°C) for about 4-6 hours. Keep in mind that the drying time may vary depending on the thickness of the meat slices and your desired level of doneness.
As you dehydrate the meat, periodically check for the desired consistency. The jerky should be firm and dry to the touch, but still slightly pliable. If it feels too moist, continue dehydrating it for a longer period of time. On the other hand, if it becomes too dry and brittle, you may have overcooked it.
Remember, the key to achieving the perfect consistency is practice and experimentation. Each dehydrator may vary slightly, so don’t be discouraged if your first batch isn’t exactly how you envisioned it. With time and experience, you’ll be able to fine-tune the drying process to achieve the best results.
Tasting and Final Thoughts
After marinating and dehydrating the meat, it’s time to taste the final product and share some thoughts on the jerky-making process.
Reviewing the results of the jerky
The jerky turned out to be delicious and flavorful. The marinade infused the meat with a perfect balance of soy sauce, Worcestershire sauce, and other seasonings. The beef and elk jerky both had their unique flavors, with the elk jerky having a distinct gamey taste. Overall, the jerky was a hit and a great way to preserve and enjoy the meat.
Comparison between beef and elk jerky
Both beef and elk jerky turned out to be equally delicious. The beef had a milder flavor that paired well with the marinade, while the elk had a richer and gamey taste. It’s a matter of personal preference, but both options are worth trying.
Suggestions for adding more spice
If you prefer a spicier jerky, there are a few ways to add more heat. You can increase the amount of cayenne pepper or red chili flakes in the marinade. Alternatively, you can experiment with different spicy seasonings to find the perfect level of heat for your taste buds.
Ideas for gifting homemade jerky
Homemade jerky makes a thoughtful and delicious gift for friends and family. Consider packaging the jerky in small bags or containers and adding a personalized label. It’s a unique and flavorful gift that anyone would appreciate, especially during the holiday season.
In conclusion, making homemade jerky is a rewarding and enjoyable process. The results are delicious, and the customization options are endless. Whether you’re using beef or elk, experimenting with different marinades, or adding more spice, making jerky allows you to create a snack that is truly your own. So gather your tools, marinate the meat, dehydrate it to perfection, and savor the mouthwatering taste of your homemade jerky!
FAQ
Here are some frequently asked questions about making jerky:
Can I use other types of meat for jerky?
Yes, you can use other types of meat for jerky. While venison and beef are the most common choices, you can also use lean cuts of other meats such as elk, turkey, or even fish.
How long can I store homemade jerky?
If stored properly, homemade jerky can last for several months. It is best to store it in an airtight container or vacuum-sealed bag in a cool, dry place. However, keep in mind that the flavor and texture may degrade over time.
What is the recommended thickness for jerky?
The recommended thickness for jerky is typically around 1/8 inch. This thickness allows for even cooking and drying and reduces the chewiness of the final product. However, you can adjust the thickness according to your personal preference.
Can I make jerky without a dehydrator?
Yes, you can make jerky without a dehydrator. While a dehydrator provides consistent and efficient drying, you can also use an oven set to a low temperature or even air-dry jerky. However, keep in mind that the drying time may vary and the results may differ from using a dehydrator.
How do I prevent the jerky from becoming too chewy?
To prevent jerky from becoming too chewy, it is important to slice the meat thinly and evenly. Thinner slices dry more quickly and result in a less chewy texture. Additionally, make sure to marinate the meat for an adequate amount of time and dry it at the recommended temperature for the appropriate duration.